Showing posts with label mpg. Show all posts

29 June 2013

Your Actions are (part of) Causing that Traffic Jam You're Stuck in*

*In the morning and evening of most large American cities (especially those surrounded by plenty of suburb), when everyone is driving their cars to their 9-5 jobs, there are simply too many vehicles on the highway for the lane capacity.  You get on the highway at the nearest entrance, and proceed to average 15mph the entire distance from your suburban home to the downtown city center where you work, frequently coming to a complete stop, never going more than 25mph at the most.

In that situation, traffic is going to go slow, no matter what.
That isn't the type of traffic jam I'm talking about.
There is also another type of traffic back up.  The kind that happens in moderate traffic.  Everyone slows down, sometimes even to a complete stop, and then a few hundred feet later, you are moving again at 50, 60, 70mph, as if nothing happened.
Sometimes this happens because there is the aftermath of a crash in the shoulder, or even across the divider on the opposite shoulder of the oncoming lane, and all the drivers feel it is very important for them to take a good look at it, because humans are just like that.  Other times its because someone is getting a traffic ticket, and, even though the cop is clearly busy at the moment, people imagine they are more likely to be caught speeding if the can see a police car.
But most often, these slow downs happen for no apparent reason at all.  You get to the front of it, and cars are accelerating just as suddenly as they slowed down.
Sometimes traffic pulses like this, fast - slow - fast - slow - fast - slow for miles.  In some places, not quite as dense as in the first example above, the daily commute does this pulse jam every single day.
When you find yourself in this situation, the choices you make can either make it better, or they can make it worse.  If you are reading this, there is a decent chance you are one of the few who makes it better already - but if you are like most people, there is a much better chance you are making it worse. 
In fact, if everyone realized what I'm about to explain, and acted appropriately, those slowdowns would never happen in the first place, but, of course, most people don't know any better, so its hard to hold it against them.
At least once you have finished reading this, there will be one more person who understands whats going on, and makes it better instead of worse.

The easiest way to understand how individual actions make the backup better or worse is with an analogy.

Lets say you are in a crowd, and for some reason everyone wants to go through a doorway as quickly as possible (the iconic burning theater, perhaps, or maybe just a Black Friday sale).
Each individual is acting as an independent free agent, and each wants their own personal speed to be as fast as possible.
What happens? 
Everyone rushes the door, and they get stuck on each other as they try to squeeze through all at once.  In extreme cases people get trampled, occasionally fatally, but even if everyone stays on their feet, the chaos amplifies the bottleneck and it takes an even longer time for everyone to get through.


Now consider an equally large crowd, but imagine they consist of a highly trained military company.  When the fire alarm goes off, instead of each individual going straight for the door and attempting to shove each other out of the way, they all immediately form a single file line down the center of the room, each taking their place based on where they started, no one "cuts in line", everyone moves at a quick but controlled pace and never any faster than the person in front of them.
In the second scenario the very last person to go through the door gets through faster than the middle person in the free-for-all scenario.
What has changed?  Each individual is moving a little bit slower, they all give each other a little more space, and no one runs around to the edge of the door to try to squeeze in from the side.  The exact things that people acting as individuals do to try to optimize their own individual escape time are what cause them to get stuck on each other and, paradoxically, means they and everyone else gets out slower.
Researchers have looked at this phenomenon of "more haste, less speed":

The desire for speed overwhelms the desire to avoid collision and the blob people jam up against one another -- just as salt can jam the shaker even though the hole is bigger than the largest grain. The room takes longer to empty even though everyone tries to move faster -- handfuls of people escape in bursts between clogging events.

You can see something analogous on the highways everyday.  Drivers attempt to go as fast as possible at all times, even when there are other cars ahead of them.   Many tend to drive as close as possible to the car ahead, much closer than the recommended 2-3 second rule from drivers-ed class.  When coming up on a line of stopped cars ahead, they will keep a foot on the accelerator as long as they possibly can before hitting the brakes hard just in time to prevent impact.  And any time one lane is temporarily going slightly faster than the one they are in, they pull into it to gain one or two car lengths over those around them. 
The overly aggressive drivers are obvious.
But almost everyone contributes, if to a lesser extent, to the same general phenomenon. 
Say every car is as close as is safe to the car ahead, in every lane, and everyone is moving at a constant rate.  Now what happens if one car wants to change lanes?  Since the cars are all as close as can be already, there is no possible way that the car can change lanes smoothly, because someone is going to have to slow to let them in, and they will have to slow to make the merge.  Now the following cars in both lanes have to brake.  And since the cars behind them were already as close as possible to them, those cars also have to brake.  And since the cars behind them... you get the idea... the stopped cars now travels back through the traffic in a wave. 
Now the same scenario - except the drivers are self-regulating like our military company escaping the burning theater: each car leaves a gap from the car ahead of them large enough that another car can safely merge in front of them.
Now when a car inevitably needs to change lanes, they can do so without slowing down, and without making the car behind them slow down.  They and the car behind them will want to reopen the gap that they just filled, but this can be done gradually over time, with only minor adjustments to speed, and the wave of stopped cars never occurs.

Traffic engineers can control individual driver behavior by putting in deliberate bottlenecks, called metering lights - the kind found at toll plazas and some on-ramps, where everyone is supposed to wait just a couple seconds before they merge with traffic.  Everyone ends up on the highway, but that moment of waiting forces everyone to space themselves out, and even though you had to wait, it is more than made up for by higher average speeds for everyone - including you. 
Sometimes you can even see a similar effect from lane closures or rubbernecking - a section of highway that is moderately backed-up everyday, but on one occasion has a lane closed for construction or due to an accident, if its near the beginning of your trip, occasionally has you get to your destination faster than usual.  As the cars slow down for the bottleneck, and then reach the end and start to accelerate one at a time, they spread themselves out, just like a metering light would have done. 
An identical effect is seen with the crowd of pedestrians trying to get through a doorway; putting an obstacle in the way of the exit actually makes the crowd get though it faster.


Most fire codes require that the pathway to an emergency exit be kept wide open, but according to researchers in Japan, placing an obstruction next to an exit may actually help crowds of people to get out of a room more efficiently.

Researchers found that when people bottleneck near an exit, they start to jostle each other for position. The jostling acts much like friction, slowing down the rate at which people can exit. Introducing a strategically-placed obstacle near the exit can reduce the number of people pushing for the exit, speeding up the rate at which people can pass through.

"We found that we can evacuate faster if we put an obstacle at the suitable position in front of the exit," said Daichi Yanagisawa, who lead the study from the University of Tokyo in Japan.
Even without metering lights, though, you can make a conscious choice to help traffic you are in move more smoothly.
Pay attention to the road ahead.  If you see an ocean of brake lights up ahead, take your foot off the accelerator.  There is no point in racing to be the first to come to a stop.  Resist the urge to change lanes every time one appears to be going slightly faster, unless you have enough space that you can do it without anyone having to slow down for you. Leave a big enough gap between you and the car ahead of you that someone else could safely merge in front of you without you having to slow down.  That applies at any speed, from stop and crawl to over the posted limit** - not only will it smooth out traffic flow, it will also reduce your chances of being involved in a collision, not to mention reduce other people's road rage.  No one can cut you off if you choose to slow down and let them in.
That means people will get it front of you.
And that's ok.
At as slow as 10mph, one car length costs you all of one second.  At 35 it costs you one third of one second.  Big freggin deal!  Let 50 cars get in front of you on a trip with a 45mph average speed, and you get where you are going all of 30 seconds later than you would have had you made sure to be the one to go first.
Not only have you made 50 people a little happier, but you have helped traffic flow a little better for all the people behind you, all the way back down the highway.
Better still, when you are coming up to one of those pointless braking waves, and you start slowing down well in advance, often times it will have completely cleared itself up by the time you get to where it was.  Which means by simply taking your foot off the accelerator, you never have to brake at all.  By avoiding coming to a complete stop, your average speed ends up being higher!  Its quite like timing traffic lights - if you try to go faster than the timed lights are designed for, you have to stop for the red, and someone driving at the speed limit will pass you just as it turns green again while you are accelerating from a stand still.
And if driving with less pointless starting and stopping, less stress, and helping to clear up traffic jams wasn't enough, this also happens to be the best way to minimize fuel when driving in traffic, so you save cash too, along with the environment and America's energy independence. 

Next time you are driving, think about this essay.  When someone exits in front of you, leaving a huge gap between you and the next car, don't rush to catch up.  When you are entering the highway, and the on-ramp is clear but the merging lane is slow, don't stay on the on-ramp until the very last second and then cross over the solid white line in an attempt to pass as many other cars as possible.  You are saving yourself a negligible amount of time, probably less than a second, but you are creating a braking wave that will snarl the traffic behind you potentially for miles.  Think about the orderly single file line, and how much faster everyone exits the building.  Everyone else is going to drive how they are going to drive, but at least you won't be making it worse.  And who knows, if enough of us start doing it, a few others might just take notice, and sooner or later stop and go traffic waves will simply cease to exist.

24 October 2012

Aerocaps for pick-up trucks

Aerocaps for pick-up trucks

by Bakari Kafele on October 24, 2012
AerolidWhen people think about fuel economy, they usually think about small cars, perhaps a mid-size hybrid.  If they think about trucks, its usually to contrast them with a more efficient vehicle (and perhaps chastise truck owners for their wasteful choice).
But while cars are great if you need to get yourself and maybe a few other people from one place to another, they don’t excel in moving large amounts of stuff, and can’t tow very much.
If you regularly need to move lots of big, bulky, or heavy stuff, or tow something large and heavy, but rarely need to move more than a couple people, a truck makes a lot of sense.
Of course there is a reason that trucks are seen as inefficient: they are.  They are heavy, overpowered (although cars are even more so these days), and not at all aerodynamic.
Then again, because trucks get such low mileage to begin with, improvements in their mileage have a relatively bigger impact.  For example, an increase of 15mpg for a 45mpg car is a 33% increase and will save 55 gallons of fuel over 10,000 miles.  Not bad, but that same 15mpg improvement to a 15mpg truck is a 100% increase, saving 333 gallons over the same distance.
So what is a mpg-conscious person who needs to move a lot of stuff to do?


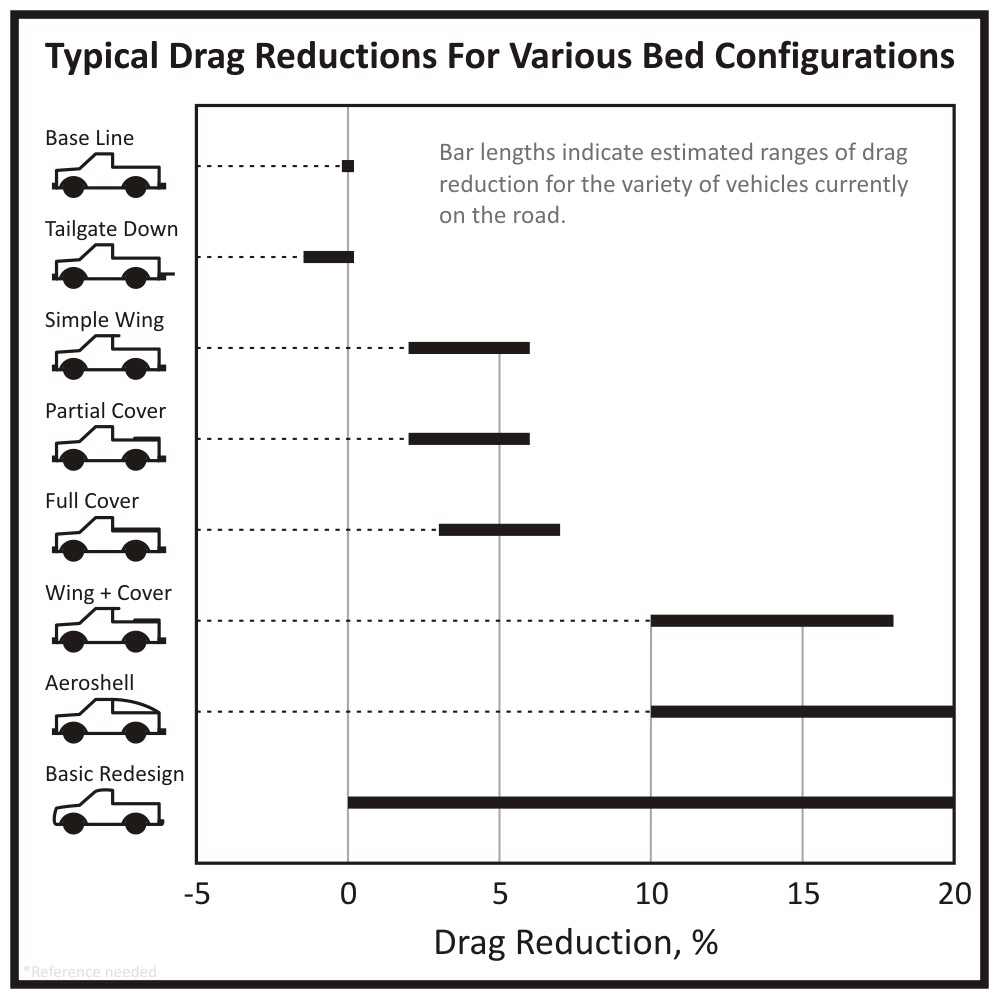
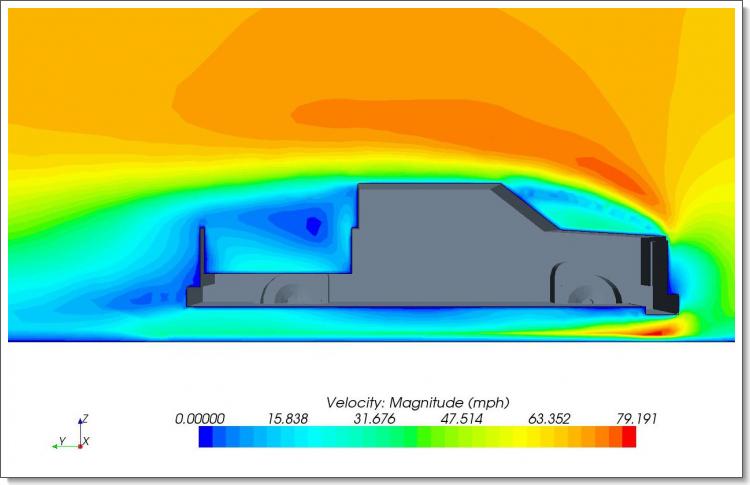
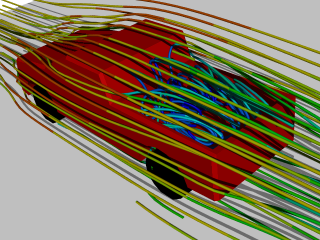
The classic question was whether its better to drive with the tailgate up or down – the reasoning being that the tailgate might be catching the air coming off the roof like a parachute, being a flat vertical surface and all.  It turns out though that (at least for most trucks) that at speeds an air bubble naturally forms in the truck bed of an open bed pick-up with the tailgate up, and that creates a virtual tonneau which deflects the air current over the gate.  With the tailgate open, that bubble can’t form, and aerodynamics is actually decreased overall, reducing MPGs along with it.


(image from: http://johnversteeg.com/projects/2 )

(image from: http://www.symscape.com/blog/tailgate-up-or-down )
It’s important to note that this does not seem to be universally true; while the MythBusters and some (better controlled) studies have found better fuel economy with the gate up, other studies have found the opposite: reduced air drag with the gate down.
Which actually shouldn’t be too surprising, given the complexity of fluid dynamics, and the plethora of shapes and sizes and other variables that go into the design of a truck bed, cab, and tailgate, from length of bed and height of cab, to whether edges are sharp or rounded.  In any case, neither shape of truck bed is optimal for aerodynamics, and the potential improvement gained by tailgate position is relatively minimal.
The next step in truck aero evolution is the tonneau.  When installed, it makes the truck bed a solid flat surface at the height of the bed rails and tailgate.


Now instead of a virtual surface closing the truck bed, consisting of a bubble of air, there is an actual surface there, to do the same thing.
Unfortunately, this is still far from the ideal tear-drop shape, and (again, unsurprisingly) while it is frequently seen to improve fuel mileage, it isn’t by terribly much, and it doesn’t consistently show any improvement at all.
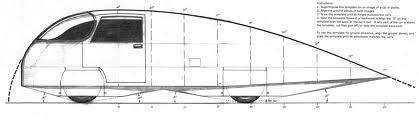
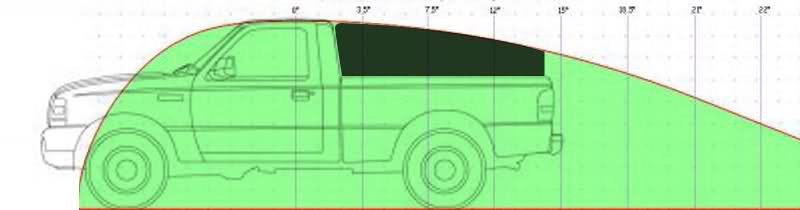
The goal is aero-mods is to make a vehicle as close to a teardrop shape as possible.


And while many car designs typically match this shape better than an open bed pick-up truck,

the large bed area (with no particular requirements for headroom) leave a lot of room for modding a cap to make it fit the shape even better:


The result is referred to as an “aerocap” or “aeroshell”, and it can potentially give a truck lower air drag than some cars, while providing a covered and secure space to store cargo.

Of course none of this is news to serious ecomodders, and a large number of varying designs have been built, with different solutions to balance the trade-offs of maximum aerodynamics, interior space and accessibility, rear visibility, being securely attached but easily removable (in case on needing to use the truck bed for large items), and looking seamless and integrated.
Here are some of the designs that have been showcased in the ecomodder forums:

AeroHead / ITworks / Phil Knox’s T-100
Inline image 1
One of the very first.  Phil has been aeromodding since the oil embargo of the 1970′s.  This particular truck was in the form in the picture in 2005.
Measured coefficient of drag on the stock truck, plus aeroshell: 0.325
For reference, an open bed pick up has a cd around 0.40 to 0.45, a typical car 0.30 to 0.35, and the original Honda Insight had a Cd of 0.25, the lowest of any standard production car.
The lower the number, the less air resistance.
With all of the mods shown in the picture, coefficient of drag dropped all the way to: 0.25
The shell alone caused a 13% highway mileage improvement compared to the same truck at the same speed without it, 27.5 miles per gallon (EPA 25), and with all aeromods it got 32mpg at 70mph.
For more on this truck, see: http://www.evworld.com/article.cfm?storyid=870

AeroHead / ITworks / Phil Knox’s T-100: V2
Inline image 7 Inline image 2
Inline image 3 Inline image 4
The original aeroshell was partially eaten by goats (or something like that…)
So he started over, and built another, goat-proof shell, and, as heavily aero-moddified as the first version was, he took the new one even further.
The new shell is made from the hull of a sailboat – you can tell in the first picture, the others are the same, just painted, and later with a window which removes the passenger side blind spot.
Aerohead takes this to Bonneville for racing and setting records and such, so the priority is maximizing aerodynamics over cargo carrying utility (the shell is removable though, so the truck could be used like a truck).
Theoretical Cd of 0.156
almost 80% mpg improvement compared to an original unmodified T-100, at 36mpg highway!
And yet still this was not enough – he has also built a trailer that attaches to the back of the truck just to extend the aerodynamic taper even further!
Inline image 5
Wow.  Just wow.
A labor of love with years and years of labor put into it.
For more on this absolutely magnificent monstrosity, see:
http://ecomodder.com/forum/showthread.php/pickup-truck-streamlining-14884.html
http://ecomodder.com/forum/showthread.php/basjoosing-toyota-t-100-articulated-front-wheel-skirts-22971.html
and
http://ecomodder.com/forum/showthread.php/full-boat-tail-trailer-gap-fillers-toyota-t-7839.html

Bondo / Brett Herndon’s Aerolid
Inline image 8 Inline image 9
Ok, so the ITworks T-100 may be a little too extreme for the average pick-up truck owner.
On the other end of the spectrum of customization and labor required by the end user is the very polished and professional looking “Aerolid”.
These are available for purchase.
The long term goal is funding for large scale commercial availability (patent pending), but even without corporate sponsorship, he has already produced several on his own, and has a website up for their sale.
Highway mileage increase (on this truck) of over 20% 18mpg to 22.
For times the truck needs to be used for serious truck stuff, the center section can be removed without removing the entire shell
Inline image 10
If a load is just a little too big to fit under the shell, but not so big it has to be removed entirely, it is hinged and can swing up partially; also making it a potential place to hang out while camping.
Inline image 11 Inline image 12
For more interior space and even better aerodynamics, there is an optional extender kit that is deployed with the tailgate down, which can fold away when not in use
Inline image 13 Inline image 14
Inline image 15 Inline image 16
For more on the Aerolid, see his website:  http://www.aerolid.com/
or the ecomodder thread http://ecomodder.com/forum/showthread.php/commercially-produced-aerodynamic-pickup-bed-cap-583.html


In between those two extremes the DIYers at Ecomodder have come up with plenty of unique designs:


SkyKing’s aeroshell/boat tail for the Dodge truck “Woody”

Inline image 17
Made from laminated plywood sheets on a plywood frame, this design goes further and lower than any other.
26mpg highway from an otherwise unmoddified (except those beautiful wood side boxes) 1-ton.
For more on Woody’s shell, see:  http://ecomodder.com/forum/showthread.php/testing-aeroshell-boat-tail-dodge-22354.html


T Vago’s
compound curve foam board pickup aeroshell


Inline image 18 Inline image 19
10% improvement, from 19mpg to 21mpg with no other mods.
Its made of foam, so its very light; which is good, sense adding weight reduces fuel economy, which would be counter-productive.  Also, it makes it easier to take off when the bed space is needed for big bulky stuff.
You can read much about its design process on a previous blog post:  http://ecomodder.com/blog/makings-pickup-aerocap-vagos-dakota/
as well as the forum thread http://ecomodder.com/forum/showthread.php/t_vagos-compound-curve-foam-board-pickup-aeroshell-15862.html


BamZipPow’s T-100 Aerocap


Inline image 20
Made from coroplast (plastic sheets) over wood and metal frame.
Up to 27mpg highway.
Long thread covering everything from concept to construction to V2 trials:
http://ecomodder.com/forum/showthread.php/another-truck-aero-cap-idea-15137.html


JRMichler’s Nameless’ Canyon topper


Inline image 21 Inline image 22
Along with other mods, improved mileage from 21mpg to 30mpg in winter, and 27 to 35 in summer, with around 2mpg of that increase specifically upon replacement of the original non topper with this one.
Believe it or not, it is constructed of plain old plywood, waterproofed and strengthened with epoxy, and prettied up with some hardware store paint.
Details at http://ecomodder.com/forum/showthread.php/modding-06-gmc-canyon-17070.html


JRMichler’s brother’s Ford F-250


Inline image 23
Mileage of 23.5mpg, up from 19.5
Not a lot of information on it is public, but what there is is here:
http://ecomodder.com/forum/showthread.php/modding-02-ford-f250-16798.html


Bajascoob’s Lightweight Aerocap on BigWhiteWhale


Inline image 24 Inline image 25
In addition to being relatively light, this design neatly solves the issue of reduced visibility created by every single other aerocap design.  The entire thing is completely translucent.
Unfortunately, plastic film isn’t 100% clear, so while he can see headlights behind at night, it isn’t clear enough to allow eliminating outside side mirrors.
Went from 16 to 19mpg.
Made of 1/2″ metal conduit frame wrapped in 4mm film, for a total of roughly $20 material cost.
More here: http://ecomodder.com/forum/showthread.php/f-250-7-3-4wd-light-aerocap-12573.html


Swede’s Aerolid


Inline image 26
Coroplast over a welded 1/2″ conduit metal frame.
13% improvement, from 20mpg to 23.
Read more:  http://ecomodder.com/forum/showthread.php/swedes-aerolid-build-thread-13092.html


Kevlar’s aero “Toyota truck”
(Apparently in 1992 Toyota didn’t give its trucks model names or numbers?)
Inline image 27 Inline image 28
Made of fiber-reinforced plastic board panels, the stuff public restroom stalls are made from.
31mpg actual, with an EPA estimate of only 24mpg highway
Since sold – and the new owner is reporting even better mileage, 32-36mpg.
http://ecomodder.com/forum/showthread.php/aero-truck-project-begins-2269.html


Ccrider’s Tacoma Aerocap


Inline image 30 Inline image 29
1/2″ Plywood on a wood frame.
$45 worth of material, including the paint.
30+ mpg in a truck rated for 20.
Simple, inexpensive, yet the numbers speak for themselves.
Build thread at: http://ecomodder.com/forum/showthread.php/aerocap-tacoma-pickup-11271.html


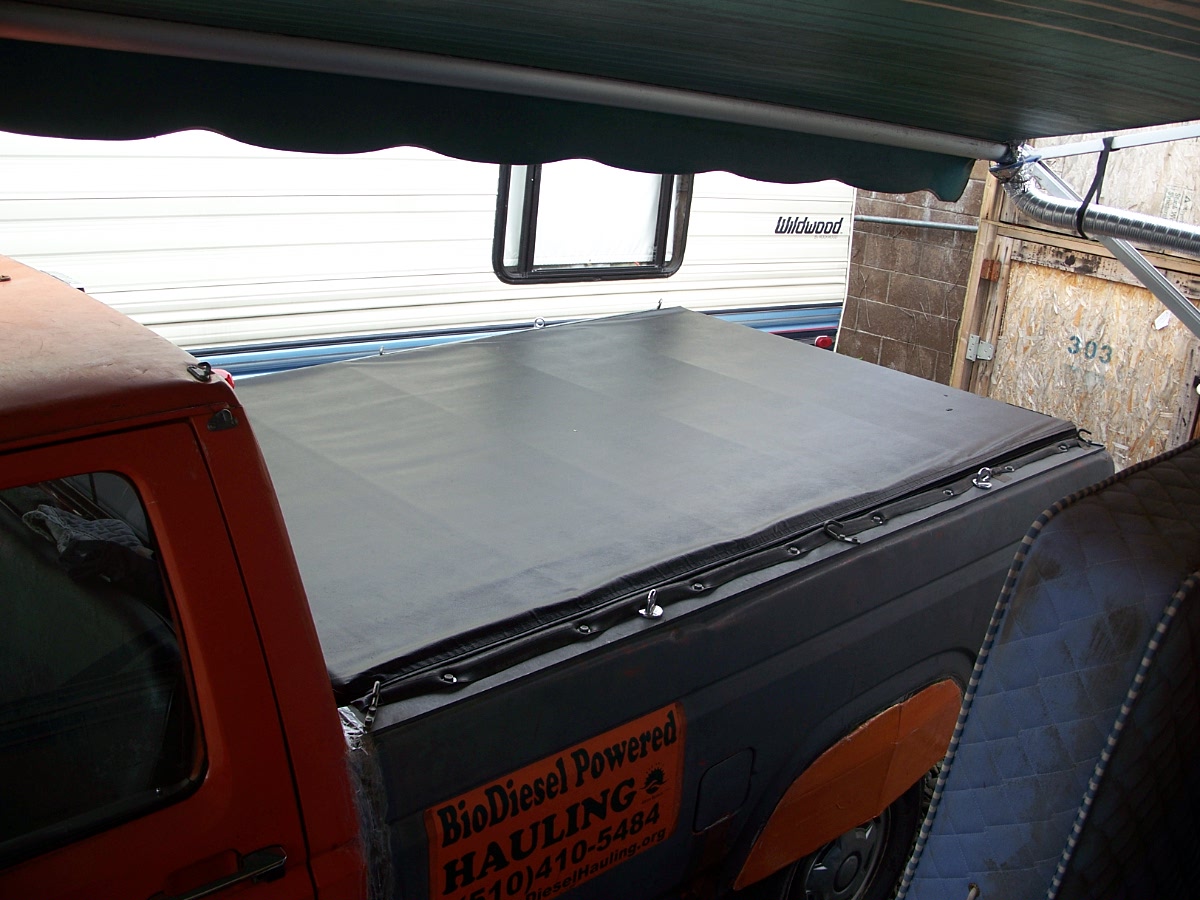
Jacob Aziza’s Big Orange Work Truck’s tilted tonneau

(That’s me, the author)

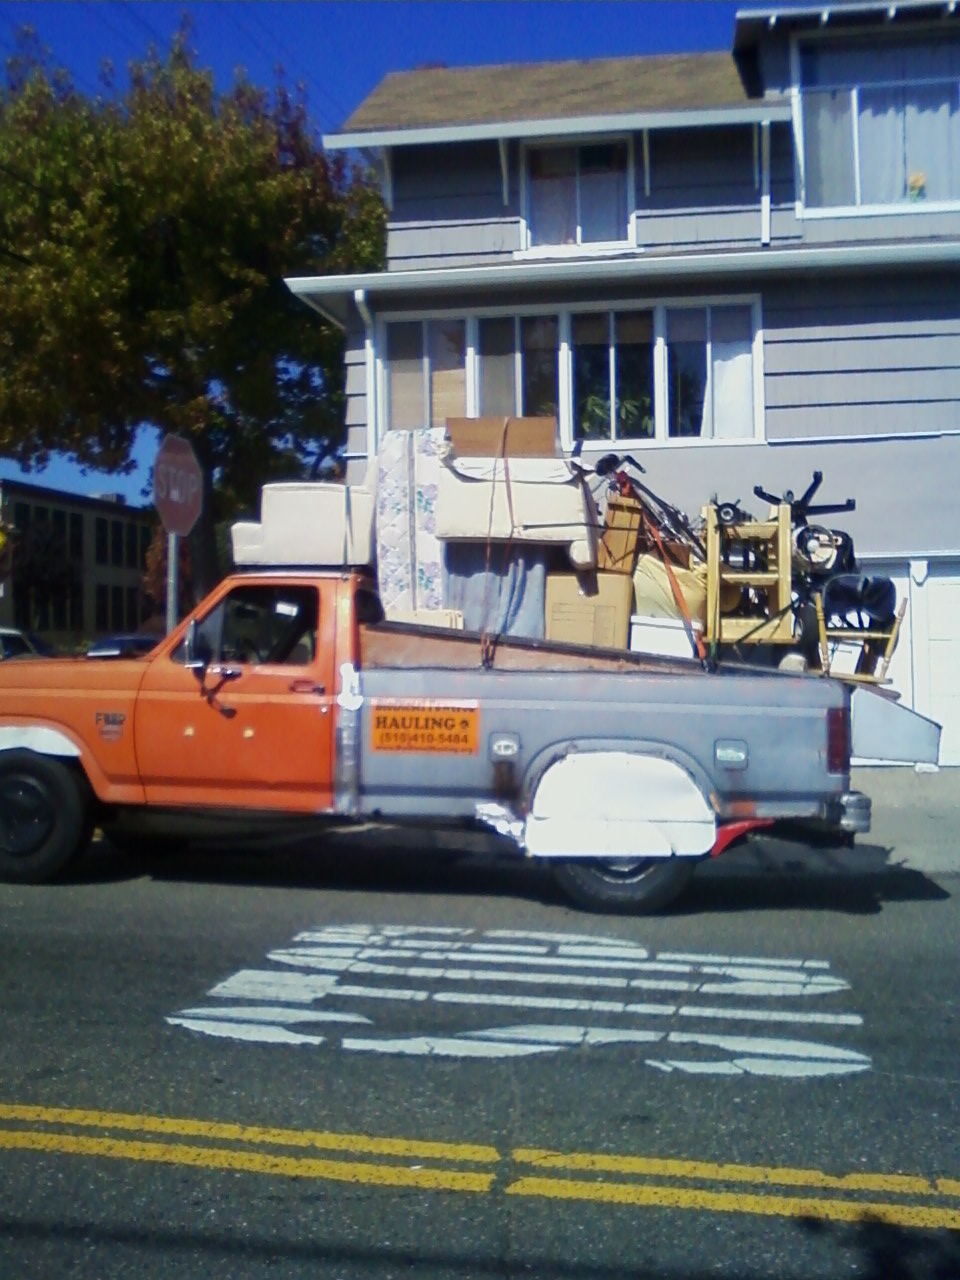
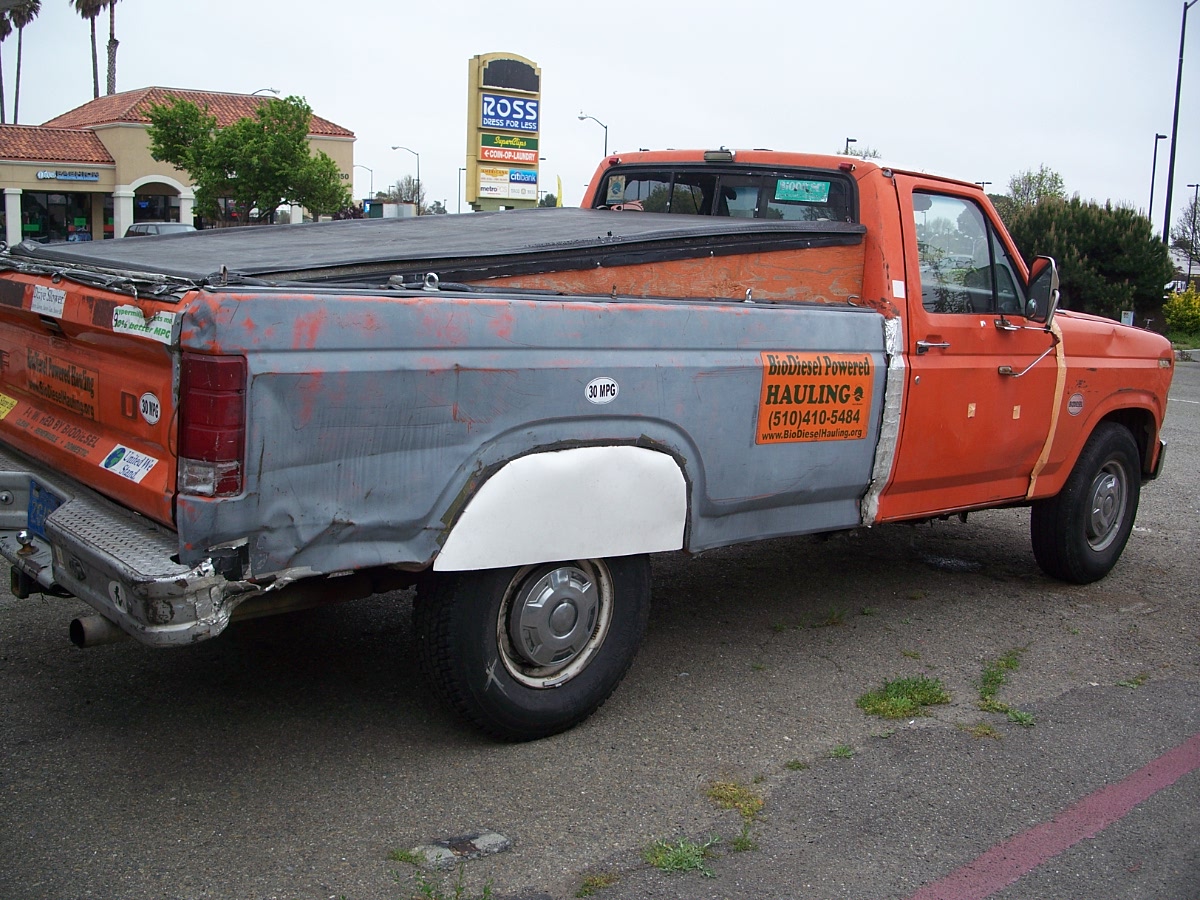
Mine represents the opposite extreme from the first truck in this list, the ITworks T-100 in the trade-off between aerodynamics and the ability to use the truck bed.
Unlike every other design, the cover does not actually start at the roofline.  From an aerodynamic perspective this is a pretty major design flaw – it means that the air flowing off the back of the roof will not continue on smoothly to the cover, but will actually separate, leaving an air space of slower moving and potentially turbulent air right behind the rear window.
I was aware of this when I built it, but I decided it was more important to have a fully unobstructed view to the rear.  I regularly drive this truck in dense city traffic, at lower than normal speeds on major highways, and have to back up down driveways so narrow that I have to fold both side mirrors in.  In other words, I use my rear-view mirror a lot.  And even without a cover, I managed to back-up into a parked motor scooter once.  So I decided to sacrifice optimum aerodynamics and have the bed cover start about midway between the top of the bed and the roof.  I have a rearview mirror mounted just below the ceiling inside, and being higher than the top of the cover means I can see over it right to the edge of the tailgate.  I actually have a better view to the rear than with the stock mirror set up.

My other consideration that required a major trade off in maximum efficiency for maximum utility is that I regularly use the truck to haul things which would not fit under any of the above aerocaps, even the hinged ones if they were at maximum tilt angle.


Some of the aerocap designs have removable tops, or remove relatively easily for those times, but those times are so frequent for me that it would be extremely inconvenient to have to be constantly removing and replacing a cover. Besides for which, living in an RV, I have nowhere to store a large aeroshell when not in use.
Most of the time my trip goes something like: travel to location with bed empty, pick up bulky stuff, transport it to somewhere else, travel home with bed empty.  So if I was going to do anything to make the truck bed more aerodynamic, it had to be something I could remove completely within seconds while in the field, store it out of the way on the truck, and then deploy it again just as quickly for the trip home.
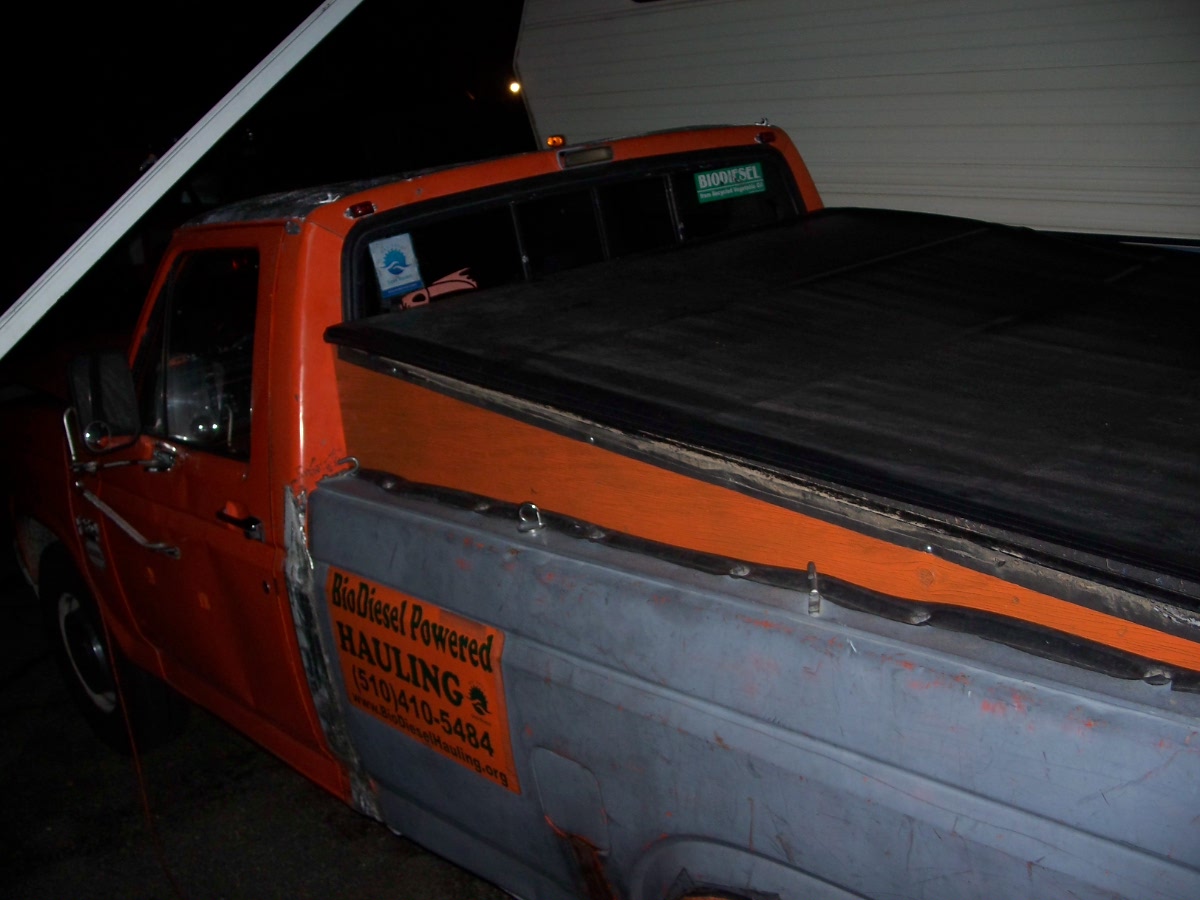
My solution was to take a standard, commercially available roll-up vinyl tonneau cover, and mount it on triangular plywood sheets.  When I need to access the bed, I just roll it up.  If the bed is empty (or carrying little enough) I roll it down, and the built-in rails keep it locked down.  While not the ideal angle, it still lets the air coming off the roof travel down to the tailgate level more gradually.
Vinyl tonneau with metal stabilizers on metal rails attached to plywood sides.
I already owned the tonneau (originally cost about $180), and used some old plywood and bolts I had lying around, for an additional cost of $0
My overall average mileage (on an already heavily modded truck) increased from 26mpg to 28, and test-run highway mileage from 28mpg to 30.
A lower improvement than many of the other designs – no doubt due to not starting at the top of the roofline – but an improvement none the less, and not too far behind most of the other numbers when reporting an actual before and after (as opposed to comparing with the EPA numbers – after all, the expected mileage for my truck is around 15mpg)


There are surely more that I have missed.  Hopefully there will be plenty more to come.
Its always best to buy the smallest vehicle that will fit your daily needs, (and rent a truck if you only need one every now and then).
But for those few people who legitimately do need a big truck, there is no reason to resign yourself to terrible fuel mileage.  If ecomodders can get hybrid like mileage out of ordinary cars, we should be able to get at least ordinary-car-like mileage out of big trucks.
If you’ve been inspired to improve your own truck, post on the forum with your thoughts and questions.  There are a lot of helpful knowledgeable people who will be more than happy to give you any advice you may need to do a similar project of your own.

Update: Oct. 25, 2012 …
For even more examples of aerocaps in the EcoModder forum, see: http://ecomodder.com/forum/showthread.php/comprehensive-list-aerodynamic-pickup-caps-aeroshells-ecomodder-elsewhere-23775.html

13 July 2012

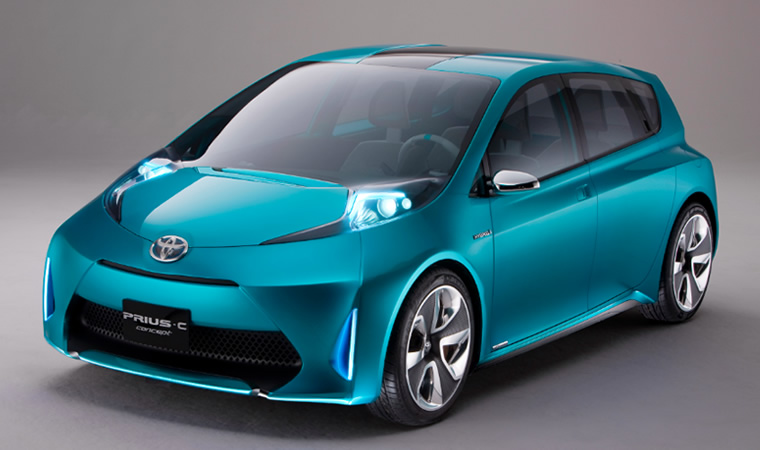
Prius C: A sub-compact hybrid, at a non-hybrid price.

Prius C: A sub-compact hybrid, at a non-hybrid price.

by Bakari Kafele on July 13, 2012

The newest Prius, available for only 2 months now in the US, is a compact fuel-efficient hybrid.
One thing it is not, however, is a Prius.


The car is really a Yaris hybrid.

But, given that “Prius” is basically synonymous with “hybrid” among average Americans, and that the Yaris may seen by some as an “econ-o-box,” it is a smart marketing move on Toyota’s part to label it as a Prius. (In its home country of Japan it isn’t called a Yaris hybrid either, its called the Aqua).
Despite the misnomer, both the pricetag and the size reflect its true roots as a Yaris.
Sticker, at just under $19,000 baseline, is over 20% less expensive – $5000 less – than the standard model. Of 337 different models available for sale in 2012, only 17 cars are cheaper – and none of them are hybrids.

The first time I was in the original Prius, I was shocked at just how large the interior felt. It almost seemed more like a small minivan than the “compact” car it was classified as. I guess this shouldn’t have been surprising given how most long-lasting models have been super-sized over time (the modern Honda Civic, for example, is an entire 3 feet longer than the original Civic) – but it was not that long after the debut of the first US hybrid, the Insight, and I had assumed the Prius would be a 4 passenger version of that tiny car.

Ever since, it has seemed rather odd to me that the vehicle with the best (standard) mileage for sale in the US is one which falls in the 4th highest of the 5 size ratings. Surely, I imagined, something with a Prius like drive-train, but in a mini or compact size, should be able to get even better mileage.
It took them 12 years to do it, but the “Prius” C is just that.

It is over 1 1/2 feet smaller, 2 inches thinner, and almost 2 inches shorter than the original Prius, as well as 500lbs lighter – it’s actually lighter than many non-hybrid compact cars, such as the Fit, the Miata, and the new “Mini” Cooper.

The ‘C’ in the name stands for ‘City,’ where the small size would make parking easier and the lighter weight will help fuel mileage. As it does, at least in city traffic, where its meant to be used. By US EPA standards it gets 53mpg city, the highest rating of any (non-electric/plug-in) mass-produced commercially available highway capable auto in the country. At the same time, the EPA gives it 46mpg highway, slightly worse than the original Prius, and the two average out to a mixed rating of… 50mpg, exactly the same as the original Prius. However, it is very interesting to note that – although the marketing department is limited by law to only advertising the EPA generated numbers – Toyota’s own engineers estimate the mileage at a whopping 82mpg(US) under Japan’s mileage testing system. One tester even got 57mpg on the excessively hilly streets of San Francisco, so the official ratings are clearly conservative. Even a lead-footed car-guy tester with Car and Driver beat EPA with 55mpg on his test run.

Some of the reviews coming from professional car reviewers are pretty much what you would expect before even looking at them: this is a nice car – looks good, comfortable though small inside, handles decently, lots of technology and gadgets – but it doesn’t have enough acceleration. Its 0-60 is around 11 seconds. This apparently feels like driving through syrup to someone who is used to reviewing modern overpowered passenger cars, but for comparisons sake, a semi-tractor-trailer measures its 0-60 time in minutes or miles, and they are apparently capable of merging onto freeway onramps somehow. The more a particular reviewer is able to shift their frame of reference from performance to fuel economy, the more they liked it.

Bonus: everyone agrees that its 25-40mph acceleration of 3.6seconds – more what you’d use in city driving – is plenty.

Apparently consumer’s minds are coming around. Despite its small size and <100hp 10="" 2012.="" 2012="" 337="" 3="" 3rd="" 4="" 5000="" all="" and="" any="" aqua="" are="" as="" at="" award.="" been="" between="" by="" c="" can="" car.="" car="" cars="" combined="" compact="" countries="" deathtraps="" demand="" dying="" earn="" fact="" faster="" fastest="" first="" for="" have="" helped="" higher="" highway="" in="" institute="" insurance="" is="" it="" its="" japanese="" just="" keep="" literally="" minivan="" models="" month="" most="" much="" myth="" new="" of="" one="" only="" op="" original="" out="" over="" p="" part="" perhaps="" pick="" plug-in="" popular="" pre-orders="" prius="" produce="" production.="" projected="" rii="" riuses="" s="" safety="" same="" selling="" slowly="" small="" sold="" than="" that="" the="" them.="" they="" three="" time="" times="" to="" toyota="" two="" units="" up="" v="" was="" with="" world.="">
Then again, even though it is smaller than its predecessor, it isn’t really that tiny. While it is 1.5 feet less in front to back length than the original Prius, it is still a full 3 feet longer than the Scion iQ, another city car made by Toyota, which (unlike the Smart Car) has room for 4 passengers. The last 2 passengers might not be in luxury, but the reality is that most people, most of the time, don’t have 4 adults in the car. They have one, maybe 2, and possibly one or two children. So the iQ would probably be an appropriate size for many, if not most, households – especially if it’s the second of two cars. Of course the iQ gets nowhere near the C’s mileage (36/37), it is also $3,000 less.

I guess I will just have to keep waiting for a car to come out with the size of the iQ but the mileage of the Prius C. They are heading in that direction.

If one was going to get a new car now, the Prius C is the most efficient car out there, at a pretty reasonable price. In a decade or two, when used ones can be found on Craigslist for a few thousand, I might just pick one up myself. In the meantime, hopefully an ecomodder with a bigger bank account than mine will pick one up. I’d love to see what could be done with it in the right hands.

09 July 2012

Adding an overdrive (BW T-19 to ZF-5 transmission swap)

(Just want tips for swapping a BW T-19 for a ZF S5? Skip to tips.  Not swapping a Ford truck transmission?  Skip to the end for the results.  Continue reading for all the gruesome details of my project.  Hopefully my trails and tribulations can at least provide you some entertainment.)


If you’ve never driven a vehicle more than a couple decades old, you probably take overdrive for granted.  You may not even have a clear idea what that term means.That 5th or 6thgear, with a ratio smaller than 1.0 (meaning the driveshaft is turning faster than the engine) lowers the engine RPM speed on the highway, and can make a huge difference in the fuel used to go the same distance at the same speed.Gears on a car are just like gears on a bicycle; imagine trying to ride a bike with only a small chainring and big cog, and having to spin your legs like crazy to get anywhere at a decent speed.  Lower RPMs means less internal friction, less internal reciprocal motion, and therefore less wasted energy.
If, like me, you don’t care to spend the money for a new – or even remotely new-ish – vehicle, you may have noticed that overdrive was once upon a time not always standard equipment, or even available as an option.

The Ford F-Series of trucks has been one of the most popular vehicles world-wide for decades, and though much has changed over the years, many of the internal design factors stayed the same from one generation to the next.  They were rather reliable, so a good many older ones are still on the road.  Those two factors mean that there is much interchangeability of parts among different generations, and those parts are easy to find.
The 7th generation F-series (1980-1986) had a couple of manual transmission options, all of them 4 speed. My own 1983 diesel F-250 ¾ ton truck came with a Borg-Warner T-19, in which the 1st gear was an extra-extra low granny gear (6.32) which is normally not used.  For all practical purposes it is a 3-speed.  No overdrive gear.  In fact, even 4th gear isn’t quite direct drive, at a 1.1 drive ratio.
This means shifting into top gear at 25mph, and 2400 RPMs at 55mph.
2400RPMs means each piston is going up and down 40 times every single second, which means the mass of the piston head has to stop, change direction, move a little, stop, change direction again, 80 times every second (once up, once down, for a full rotation).  This is bad enough is a small engine with light parts and a couple cylinders (like a motorcycle) but in a heavy V8 diesel engine, a lot of inertia is going to waste.
Not a terribly big deal in 1983, when the national speed limit was still 55, but post-embargo gas prices had dropped again; the lack of stock overdrive leaves a lot of potential for increasing highway fuel mileage.
The addition of an overdrive gear reduces engine speed from 40 cycles per second down to only 28, a 30% reduction.


The 8th generation Ford trucks came with a couple of 5-speed transmission options, and although built by a completely unrelated manufacturer, they were made close enough to the old specifications that they were interchangeable.  As such, the transmission swap from gen 8 trucks into gen 7 is a fairly popular and common one.
It is possible to put any transmission from a truck from 1973 all the way to 1996 into any other from that range, provided they have the same engine size, fuel type (gas vs. diesel) and drive type (4x4 vs. 2x4).  This includes going from automatic to manual (or vice versa), although of course then you need additional parts.  With the right adapters one can even cross the engine, fuel type, and driveline compatibilities.

I’m just going to go over one of the simplest and most common transmission swaps, the one which I recently did: starting with a Borg Warner T-19 4-spd (behind a 6.9L International Harvester IDI engine) and swapping it with a ZF S5-42 which I got on ebay (the process from the T-18 or to the ZF S5-47 should be identical).  The information here would likely apply or be useful to someone doing any other 7th/8th gen F-series tranny swap as well, and maybe even 6th or 9th gen swaps - but I haven’t done them, so I can’t say specifically which parts will apply.
------------------------------------------------------------------------------
Before I started the project or purchased anything, I spent a lot of time looking up information on it.  A lot of helpful people who have done it before have taken the time to provide information on it.
Everyone consistently said “it is a bolt-in replacement”.
Well, technically it is.
The actual bolts line up perfectly between any transmission for the 6.9L and 7.3L diesel engines, whenever they were made, whatever size truck they were from.
But “bolt-in replacement” gives the impression that everything will mate up.
No.
Its just literally the bolts.
Almost nothing else is compatible.

I also found there are a lot of helpful people who answer the questions of people who get stuck on various truck enthusiast forums.  Any problem I ran across (and any you are likely to) has probably been experiences by someone else somewhere, asked online, and answered accurately.
The only problem is, you have to know the right questions to ask, (or rather the right keywords to enter into a search engine), to find those answers, and until you run into a particular problem, you don’t necessarily know the right questions to ask.

So, to insure no one else has to go through the same learning process I - and many others – have taken, I’ll list all the potential problems one may come across, if you happen to own an older Ford truck and you want to upgrade to a transmission with overdrive.
Instead of going through the entire process step-by-step, I’m just skipping to the potential problems – the things I wish I had known in advance - because there are plenty of other guides and manuals that can walk you through it - but even more because really, if you have enough confidence and experience with mechanics to even consider removing and installing your own transmission, it is actually a fairly easy and intuitive process.
If, like me, you’ve never changed a transmission, a clutch, or any other drivetrain parts, the following are things to know will make your job a whole lot easier:

  • Set aside several days aside for this project.  It should only take a day.  Should.  If there are no unexpected complications.  But you know how life is.  There are always unexpected complications.  They should be expected.  But then other, even more unexpected ones come up.  You can’t win.  Reading this will make your chances better, but leave extra time anyway.  You don’t want to be under your truck with a clamp on floodlight at midnight trying to have it running in time for the job you have the next morning.  Trust me on that.

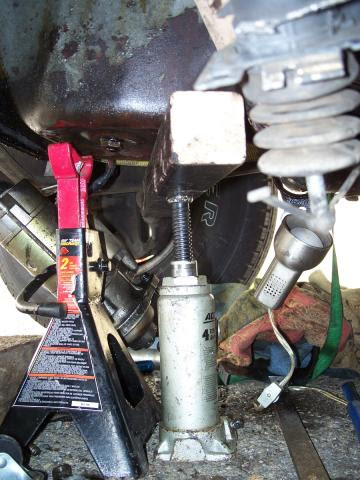
  • You don’t need any special tools other than a wide base jack (a transmission jack if you have one – I used a motorcycle jack I found on Craigslist, because it was both cheaper and more versatile for future projects).  Don’t try to use a regular bottle or scissor jack.  They are strong enough, but they will probably fall over, and then a transmission will fall on your head.

  • What you will want that you won’t necessarily find listed in the shop manual for this process is various crowbars, lengths of pipe, hammers, ratchet straps, and possibly a propane torch.  Luckily I happened to have all that stuff lying around already, and I bet you do too.
    Crowbars and pipes are for prying parts apart and pressing them together.  Hammer gets the universal joint out.  Ratchet straps hold exhausts pipes and crossmember dog-ears out of the way, and, if you lay a pipe across the opening in the floor to give something to hook to, you can use a strap to hold up the back of the transmission which lets you alter the angle independently of the jack its on.  The torch gets the stick shift off of the shifter stub.
Inline image 3
  • When you hear it is a “direct bolt-in replacement”, they mean it literally: just the bolts.  The bolt pattern from the transmission to the engine is the same, so you don’t need an adapter.  Pretty much EVERY OTHER PART that goes to or from the transmission are not compatible.
    All in all, if wanted to do everything totally properly and by the book, that would mean replacing the clutch, pressure plate, throwout fork, flywheel, driveshaft,, crossmember, and floorpan, and possibly the clutch pedal and cylinder.  I reused as many parts as I could possibly get away with, which meant I only had to buy one clutch kit and one u-joint, but that still added a couple hundred more dollars to the project than I had originally planned on.

-The Clutch.  To the naked eye 10 splines with a 1 1/8” diameter input shaft (the part of the transmission which goes inside the clutch) looks pretty much identical to 10 splines with a 1 1/4” input shaft.  But when you get the new tranny half in, that small difference in diameter means it isn’t going in, no matter how you angle it.  You may have heard – repeatedly, from multiple sources – that it is challenging to get everything lined up perfectly and get the splines to engage.  Having heard it was tricky, you might be fooled into thinking that what you are experiencing is normal.  You might think it has something to do with not using a real transmission jack, or not having a helper or two, or just not having experience.  You might spend all morning trying to get it positioned just right; before finally realizing this can’t be right, going online, and finding out the hole in the middle of the clutch is 1/8thof an inch too small, and it wouldn’t have gone in no matter what you did.
Inline image 9     Inline image 10
There are 4 possible clutches that will work: 11” or 12”, and with dampening springs or without.  If you go with a SMF (next step) you need springs, if you go DMF you need to not have them.  The simplest/cheapest option is 11”, with springs.  I used Sachs part # K0065-02, which I found at O’Reilys (same part #).  (I’m not endorsing O’Reily, they just happen to be nationwide, and fairly inexpensive, so it’s a simple example to use.  Cross reference the part numbers and shop wherever you like.  I encourage shopping at local/independent businesses)
Inline image 4
-The Flywheel.  You may or may not need to replace this.  It depends on what clutch you get (and what condition your old flywheel is in when you get the old tranny off and take a look at it).  If the clutch has springs in it, you need a single mass flywheel.  If it doesn’t, you need a dual mass.  The single mass flywheel may cause some ugly sounds when you are idling in neutral. Mine does. That’s ok, we’re ecomodders and hypermilers, we try to spend as little time idling as possible.  The engine/transmission can accept single (SMF) or dual mass flywheel (DMF) with either 11” or 12” clutch, so long as they are compatible with each other and have the correct diameter hole (1 ¼”)  and correct number of splines (10) to fit the transmission.
Inline image 12
The pressure plate may or may not also need to be replaced.  If you are changing from single to dual mass (or vice versa) the bolt holes may not line up.  The clutch kit I got came with the pressure plate, throwout bearing, pilot bearing, and alignment tool, and I kept my original flywheel, so that made this step relatively simple.
Inline image 5
-The Drive Shaft.  The yoke at the end of the ZF is slightly bigger than the T-19, so it doesn’t mate up to the driveshaft using the same U-Joint.  A lot of people deal with this by changing out the entire driveshaft (or at least the first section of it.  However, you can also find hybrid adapter U-joints that make the existing driveshaft work with the ZF.
Inline image 8
-The Universal Joint (U-joint).  This is the +shaped thing with bearings that allows the driveshaft to transmit power to the transmission, while allowing them some freedom of angle relative to each other.  Just like with the clutch, in the newer generation truck, they changed the diameter of the part just a fraction of an inch, which is enough to make the old and new incompatible.  Fortunately, adapters with one size on one axis and another size on the other axis are actually pretty easy to find at regular auto stores.  You have to go from a ZF-5 (1350 / 1.188”) to a 6.9L IDI stock driveshaft (1330 / 1.063”).  At O’Reily the part number is 448.
Be careful not to let the caps fall off, or the tiny roller bearings will go all over the place, get lost or dirty, and you’ll need to buy a whole new U-joint.
-The Crossmember.  This is the steel bar that rests on the frame, which holds up the back of the transmission.  The ZF is a couple inches longer than the BW.  The difference is small enough that you can use the same driveshaft, but the holes in the crossmemeber won’t line up.  If you can get one along with the transmission, it should fit in place of the old one.  Or you can just drill new holes in the original crossmember, and cut away a small section to fit around the back of the tranny (that’s what I did)
Inline image 7
-The Gearshift Lever.  There are several different shapes, sizes, and attachment methods.  Apparently the gas and diesel versions of the same transmission and the same year even used different attachment methods.  Plus some have straight shifter stubs (the part coming out of the tranny itself, that the lever attaches to) and some are curved.  Some levers are straight and others are curved.  If the new transmission didn’t come with the lever, you may have a fun time trying to improvise something that works.  That’s if it came with a shifter stub at all.  If it didn’t, well, I just don’t know what to tell you…
I melted the old one off of the BW shifter stub, and then drilled through it and the new shifter stub in order to bolt them together.  The old rubber was unusable after being melted off, so I used layers of bicycle inner tube and some random pipe I had lying around to fill the gap where the rubber used to be.  Because improvising is just how I roll.
-The Throwout Fork. The short arm which the clutch cable or hydraulic cylinder moves, which slides the throwout bearing back against the pressure plate.  The little mushroom looking knob thing that the fork pivots on inside the bellhousing is a slightly different diameter.  Hopefully the new transmission came with one.  If not, you could probably improvise a way to make the old one work (by trimming the attachment point that goes around the mushroom knob - it probably has an official name; I don’t know what it is)  Hopefully.  Mine came with its own.
-The Clutch Pedal / Linkage / Cylinder.  Most gas engines use a cable.  Most diesels use hydraulic.  Most automatics use neither (ok, ok, all of them).  If you are just changing with an otherwise compatible model, you probably won’t need to change any of this.  I didn’t.  But be aware it may change the release point and pedal feel.
-The Speedometer.  Some use a cable with 7 teeth.  Some use 8 teeth.  Some are electric.  I am currently using my GPS for speed.
-The Floorpan.  The ZF sticks up a little bit higher.  If you can get the floorpan from the truck the tranny comes out of, you may as well take the matching floorpan.  I was able to get my original to work, just using a couple additional sheetmetal screws to hold it down in the places it wanted to pop up.


  • Speaking of the floorpan: if you’ve done transmission work before, you may think I am an idiot.  But I’ll bet I’m not the only person who didn’t know, so I’ll just go ahead and say it – the little metal plate under the rubber boot where the shift lever goes through the floor, that’s not the floor pan.  The entire metal plate that it attaches to is.  If you remove the carpet or vinyl floor covering, you can then clearly see the bolts for the whole thing.  Removing the vinyl floor covering is neither easy nor fun.  But having access from the top is worth it.
Inline image 1         Inline image 2
  • The Chilton manual for the 7th / 8th generation F-series (which supposedly covers both gas and diesel versions) explicitly says there are FOUR bolts holding transmission to engine.  Four.  It’s the manual.  It’s the freggin manual!  The whole point is that it is supposed to give you more information in order to make the job easier.  After removing those 4 bolts, no matter how you angle things, the transmission just won’t come out.  That would be because there are actually SIX bolts!!  Now you might say “but if the manual says one thing, and you are actually there on the ground and you see extra bolts, obviously you should take them out too” right?  Welllll….  Those last two bolts are in a place where there is literally no possible way to see them.  Unless you have very skinny and long fingers, you probably can’t feel them either.  And even if you could, there is absolutely no possibly way you are going to get a wrench or socket on them.
    The secret is that, after having removed the driveshaft, you loosen the engine mounting bolts, and hold the engine up with a jack, not a block or jackstand.  Then jack up the transmission just enough to remove the crossmember that holds up the transmission.  Finally, lower the engine (with the tranny still attached to it) and when it’s low enough the two hidden bolts on top become exposed.
Inline image 6
  • It looks like the part of the bellhousing which is flared out to accommodate the starter gear might just barely clear the exhaust pipe.
    It won’t.
    Before you ever start loosening the transmission to engine bolts, detach the exhaust from the headers on both sides.  Also remove the starter.  They say you should detach the battery first.  Officially, I’m recommending that.  Unofficially, I’d point out that this would make it impossible to listen to the car stereo while you work.Inline image 11
Don’t forget also to budget for transmission fluid, which should ideally be synthetic.  All the manual transmissions apparently will work with a pretty wide range of fluids, from ATF to motor oil to gear oil.  I’m using synthetic ATF, but I don’t know enough about the pros and cons to make any recommendations.  Supposedly 30w oil will make it quieter at idle, but make it harder to shift.

What a process.  I was expecting a 6-8 hour job.  It should have been.  Had I known everything then that I know now, it would have been.  In actuality, it took almost 36 hours (maybe twice that if you count internet research and shopping time) spread over 6 days.

------------------------------------------------------------------------

The Results:
My best ever miles per gallon between fill-ups with my original transmission was 31, with several tanks getting up to 30.
On my initial test run I ran into severe traffic due to an accident.  It was like a giant 6 lane parking lot.  I got off at the first exit I could and took surface streets for the next couple cities. That delayed me enough that I then hit regular rush hour traffic for the rest of the way back to the fuel station.  I did not feel optimistic about my mileage.
It took 3.5 gallons of biodiesel to fill up after 120 miles, so despite the traffic jam, I set a new record for the truck of 33mpg.
Of course I still wanted to know just how high it could go.  Next run was at night, so there was no commute traffic to contend with.  103 miles, 2.7 gallons = 38.16mpg.
That is better mileage than the average HYBRID (36.3 – average of all hybrid models available; not average of all hybrids actually on the road) In a 30 year old ¾-ton 5500lb V8 full-size truck.  8mpg gain, or  27%, or almost $200 a year fuel savings with current prices and my average amount of driving.
At this point its not so much about saving money anymore as just seeing how far I can take it, but its nice to know that as long as I keep the truck more than another 4 years, it will eventually pay off.

Therefore, my advice to anyone who has a vehicle old enough to not have an overdrive is: swap it out.  It’s a big job, but it’s worth it.