(Just want tips for swapping a BW T-19 for a ZF S5? Skip to tips. Not swapping a Ford truck transmission? Skip to the end for the results. Continue reading for all the gruesome details of my project. Hopefully my trails and tribulations can at least provide you some entertainment.)If you’ve never driven a vehicle more than a couple decades old, you probably take overdrive for granted. You may not even have a clear idea what that term means.That 5
th or 6
thgear, with a ratio smaller than 1.0 (meaning the driveshaft is turning faster than the engine) lowers the engine RPM speed on the highway, and can make a huge difference in the fuel used to go the same distance at the same speed.Gears on a car are just like gears on a bicycle; imagine trying to ride a bike with only a small chainring and big cog, and having to spin your legs like crazy to get anywhere at a decent speed. Lower RPMs means less internal friction, less internal reciprocal motion, and therefore less wasted energy.
If, like me, you don’t care to spend the money for a new – or even remotely new-ish – vehicle, you may have noticed that overdrive was once upon a time not always standard equipment, or even available as an option.

The Ford F-Series of trucks has been one of the most popular vehicles world-wide for decades, and though much has changed over the years, many of the internal design factors stayed the same from one generation to the next. They were rather reliable, so a good many older ones are still on the road. Those two factors mean that there is much interchangeability of parts among different generations, and those parts are easy to find.
The 7
th generation F-series (1980-1986) had a couple of manual transmission options, all of them 4 speed. My own 1983 diesel F-250 ¾ ton truck came with a Borg-Warner T-19, in which the 1
st gear was an extra-extra low granny gear (6.32) which is normally not used. For all practical purposes it is a 3-speed. No overdrive gear. In fact, even 4
th gear isn’t quite direct drive, at a 1.1 drive ratio.
This means shifting into top gear at 25mph, and 2400 RPMs at 55mph.
2400RPMs means each piston is going up and down 40 times every single second, which means the mass of the piston head has to stop, change direction, move a little, stop, change direction again, 80 times every second (once up, once down, for a full rotation). This is bad enough is a small engine with light parts and a couple cylinders (like a motorcycle) but in a heavy V8 diesel engine, a lot of inertia is going to waste.
Not a terribly big deal in 1983, when the national speed limit was still 55, but post-embargo gas prices had dropped again; the lack of stock overdrive leaves a lot of potential for increasing highway fuel mileage.
The addition of an overdrive gear reduces engine speed from 40 cycles per second down to only 28, a 30% reduction.
The 8
th generation Ford trucks came with a couple of 5-speed transmission options, and although built by a completely unrelated manufacturer, they were made close enough to the old specifications that they were interchangeable. As such, the transmission swap from gen 8 trucks into gen 7 is a fairly popular and common one.
It is possible to put any transmission from a truck from 1973 all the way to 1996 into any other from that range, provided they have the same engine size, fuel type (gas vs. diesel) and drive type (4x4 vs. 2x4). This includes going from automatic to manual (or vice versa), although of course then you need additional parts. With the right adapters one can even cross the engine, fuel type, and driveline compatibilities.
I’m just going to go over one of the simplest and most common transmission swaps, the one which I recently did: starting with a Borg Warner T-19 4-spd (behind a 6.9L International Harvester IDI engine) and swapping it with a ZF S5-42 which I got on ebay (the process from the T-18 or to the ZF S5-47 should be identical). The information here would likely apply or be useful to someone doing any other 7
th/8
th gen F-series tranny swap as well, and maybe even 6
th or 9
th gen swaps - but I haven’t done them, so I can’t say specifically which parts will apply.
------------------------------------------------------------------------------
Before I started the project or purchased anything, I spent a lot of time looking up information on it. A lot of helpful people who have done it before have taken the time to provide information on it.
Everyone consistently said “it is a bolt-in replacement”.
Well, technically it is.
The actual bolts line up perfectly between any transmission for the 6.9L and 7.3L diesel engines, whenever they were made, whatever size truck they were from.
But “bolt-in replacement” gives the impression that everything will mate up.
No.
Its just literally the bolts.
Almost nothing else is compatible.
I also found there are a lot of helpful people who answer the questions of people who get stuck on various truck enthusiast forums. Any problem I ran across (and any you are likely to) has probably been experiences by someone else somewhere, asked online, and answered accurately.
The only problem is, you have to know the right questions to ask, (or rather the right keywords to enter into a search engine), to find those answers, and until you run into a particular problem, you don’t necessarily know the right questions to ask.
So, to insure no one else has to go through the same learning process I - and many others – have taken, I’ll list all the potential problems one may come across, if you happen to own an older Ford truck and you want to upgrade to a transmission with overdrive.
Instead of going through the entire process step-by-step, I’m just skipping to the potential problems – the things I wish I had known in advance - because there are plenty of other guides and manuals that can walk you through it - but even more because really, if you have enough confidence and experience with mechanics to even consider removing and installing your own transmission, it is actually a fairly easy and intuitive process.
If, like me, you’ve never changed a transmission, a clutch, or any other drivetrain parts, the following are things to know will make your job a whole lot easier:
- Set aside several days aside for this project. It should only take a day. Should. If there are no unexpected complications. But you know how life is. There are always unexpected complications. They should be expected. But then other, even more unexpected ones come up. You can’t win. Reading this will make your chances better, but leave extra time anyway. You don’t want to be under your truck with a clamp on floodlight at midnight trying to have it running in time for the job you have the next morning. Trust me on that.
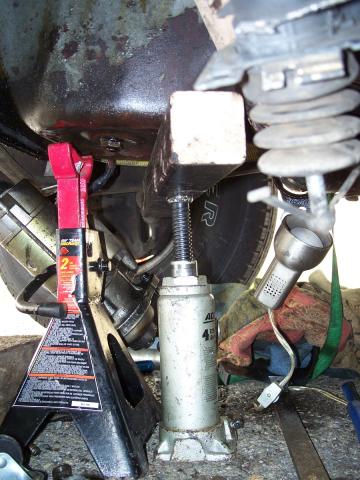
- You don’t need any special tools other than a wide base jack (a transmission jack if you have one – I used a motorcycle jack I found on Craigslist, because it was both cheaper and more versatile for future projects). Don’t try to use a regular bottle or scissor jack. They are strong enough, but they will probably fall over, and then a transmission will fall on your head.
- What you will want that you won’t necessarily find listed in the shop manual for this process is various crowbars, lengths of pipe, hammers, ratchet straps, and possibly a propane torch. Luckily I happened to have all that stuff lying around already, and I bet you do too.
Crowbars and pipes are for prying parts apart and pressing them together. Hammer gets the universal joint out. Ratchet straps hold exhausts pipes and crossmember dog-ears out of the way, and, if you lay a pipe across the opening in the floor to give something to hook to, you can use a strap to hold up the back of the transmission which lets you alter the angle independently of the jack its on. The torch gets the stick shift off of the shifter stub.
- When you hear it is a “direct bolt-in replacement”, they mean it literally: just the bolts. The bolt pattern from the transmission to the engine is the same, so you don’t need an adapter. Pretty much EVERY OTHER PART that goes to or from the transmission are not compatible.
All in all, if wanted to do everything totally properly and by the book, that would mean replacing the clutch, pressure plate, throwout fork, flywheel, driveshaft,, crossmember, and floorpan, and possibly the clutch pedal and cylinder. I reused as many parts as I could possibly get away with, which meant I only had to buy one clutch kit and one u-joint, but that still added a couple hundred more dollars to the project than I had originally planned on.
-The
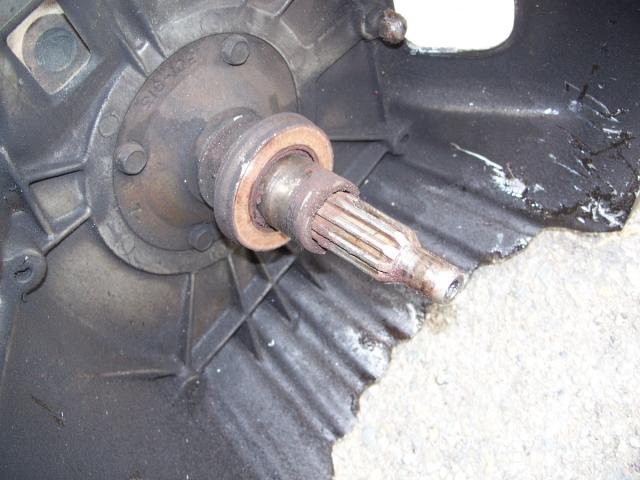
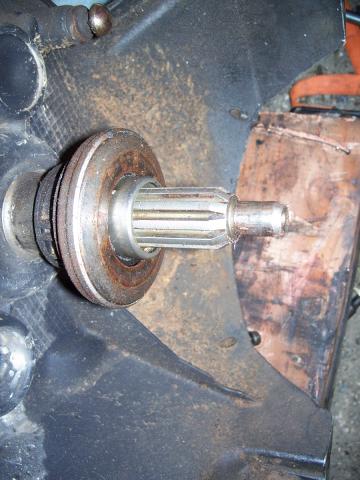
Clutch. To the naked eye 10 splines with a 1 1/8” diameter input shaft (the part of the transmission which goes inside the clutch) looks pretty much identical to 10 splines with a 1 1/4” input shaft. But when you get the new tranny half in, that small difference in diameter means it isn’t going in, no matter how you angle it. You may have heard – repeatedly, from multiple sources – that it is challenging to get everything lined up perfectly and get the splines to engage. Having heard it was tricky, you might be fooled into thinking that what you are experiencing is normal. You might think it has something to do with not using a real transmission jack, or not having a helper or two, or just not having experience. You might spend all morning trying to get it positioned just right; before finally realizing this can’t be right, going online, and finding out the hole in the middle of the clutch is 1/8
thof an inch too small, and it wouldn’t have gone in no matter what you did.
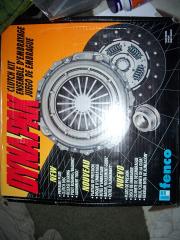
There are 4 possible clutches that will work: 11” or 12”, and with dampening springs or without. If you go with a SMF (next step) you need springs, if you go DMF you need to not have them. The simplest/cheapest option is 11”, with springs. I used Sachs part # K0065-02, which I found at O’Reilys (same part #). (I’m not endorsing O’Reily, they just happen to be nationwide, and fairly inexpensive, so it’s a simple example to use. Cross reference the part numbers and shop wherever you like. I encourage shopping at local/independent businesses)
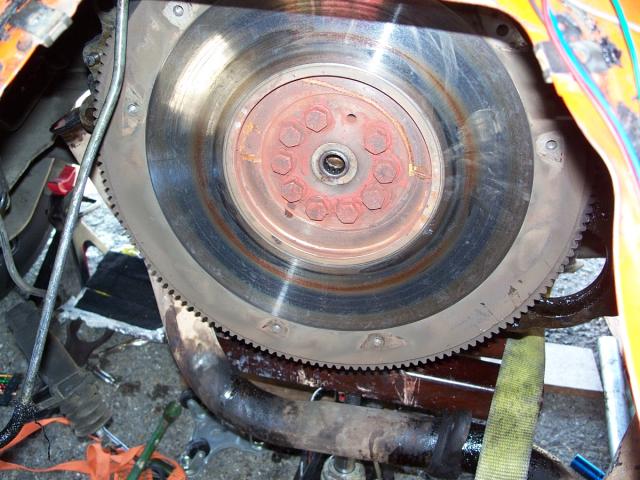
-The Flywheel. You may or may not need to replace this. It depends on what clutch you get (and what condition your old flywheel is in when you get the old tranny off and take a look at it). If the clutch has springs in it, you need a single mass flywheel. If it doesn’t, you need a dual mass. The single mass flywheel may cause some ugly sounds when you are idling in neutral. Mine does. That’s ok, we’re ecomodders and hypermilers, we try to spend as little time idling as possible. The engine/transmission can accept single (SMF) or dual mass flywheel (DMF) with either 11” or 12” clutch, so long as they are compatible with each other and have the correct diameter hole (1 ¼”) and correct number of splines (10) to fit the transmission.
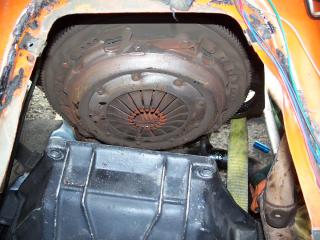
The pressure plate may or may not also need to be replaced. If you are changing from single to dual mass (or vice versa) the bolt holes may not line up. The clutch kit I got came with the pressure plate, throwout bearing, pilot bearing, and alignment tool, and I kept my original flywheel, so that made this step relatively simple.
-The Drive Shaft. The yoke at the end of the ZF is slightly bigger than the T-19, so it doesn’t mate up to the driveshaft using the same U-Joint. A lot of people deal with this by changing out the entire driveshaft (or at least the first section of it. However, you can also find hybrid adapter U-joints that make the existing driveshaft work with the ZF.
-The Universal Joint (U-joint). This is the
+shaped thing with bearings that allows the driveshaft to transmit power to the transmission, while allowing them some freedom of angle relative to each other. Just like with the clutch, in the newer generation truck, they changed the diameter of the part just a fraction of an inch, which is enough to make the old and new incompatible. Fortunately, adapters with one size on one axis and another size on the other axis are actually pretty easy to find at regular auto stores. You have to go from a ZF-5 (1350 / 1.188”) to a 6.9L IDI stock driveshaft (1330 / 1.063”). At O’Reily the part number is 448.
Be careful not to let the caps fall off, or the tiny roller bearings will go all over the place, get lost or dirty, and you’ll need to buy a whole new U-joint.
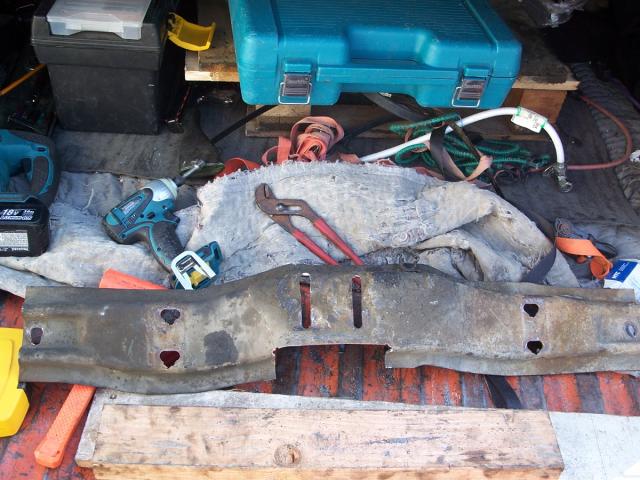
-The Crossmember. This is the steel bar that rests on the frame, which holds up the back of the transmission. The ZF is a couple inches longer than the BW. The difference is small enough that you can use the same driveshaft, but the holes in the crossmemeber won’t line up. If you can get one along with the transmission, it should fit in place of the old one. Or you can just drill new holes in the original crossmember, and cut away a small section to fit around the back of the tranny (that’s what I did)
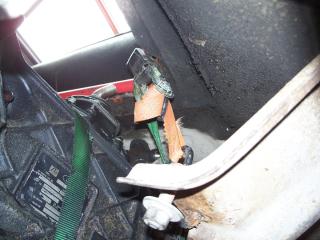
-The Gearshift Lever. There are several different shapes, sizes, and attachment methods. Apparently the gas and diesel versions of the same transmission and the same year even used different attachment methods. Plus some have straight shifter stubs (the part coming out of the tranny itself, that the lever attaches to) and some are curved. Some levers are straight and others are curved. If the new transmission didn’t come with the lever, you may have a fun time trying to improvise something that works. That’s if it came with a shifter stub at all. If it didn’t, well, I just don’t know what to tell you…
I melted the old one off of the BW shifter stub, and then drilled through it and the new shifter stub in order to bolt them together. The old rubber was unusable after being melted off, so I used layers of bicycle inner tube and some random pipe I had lying around to fill the gap where the rubber used to be. Because improvising is just how I roll.
-The Throwout Fork. The short arm which the clutch cable or hydraulic cylinder moves, which slides the throwout bearing back against the pressure plate. The little mushroom looking knob thing that the fork pivots on inside the bellhousing is a slightly different diameter. Hopefully the new transmission came with one. If not, you could probably improvise a way to make the old one work (by trimming the attachment point that goes around the mushroom knob - it probably has an official name; I don’t know what it is) Hopefully. Mine came with its own.
-The Clutch Pedal / Linkage / Cylinder. Most gas engines use a cable. Most diesels use hydraulic. Most automatics use neither (ok, ok, all of them). If you are just changing with an otherwise compatible model, you probably won’t need to change any of this. I didn’t. But be aware it may change the release point and pedal feel.
-The Speedometer. Some use a cable with 7 teeth. Some use 8 teeth. Some are electric. I am currently using my GPS for speed.
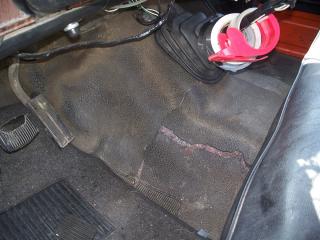
-The Floorpan. The ZF sticks up a little bit higher. If you can get the floorpan from the truck the tranny comes out of, you may as well take the matching floorpan. I was able to get my original to work, just using a couple additional sheetmetal screws to hold it down in the places it wanted to pop up.
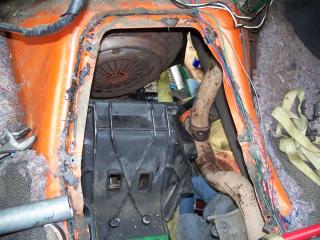
- Speaking of the floorpan: if you’ve done transmission work before, you may think I am an idiot. But I’ll bet I’m not the only person who didn’t know, so I’ll just go ahead and say it – the little metal plate under the rubber boot where the shift lever goes through the floor, that’s not the floor pan. The entire metal plate that it attaches to is. If you remove the carpet or vinyl floor covering, you can then clearly see the bolts for the whole thing. Removing the vinyl floor covering is neither easy nor fun. But having access from the top is worth it.
- The Chilton manual for the 7th / 8th generation F-series (which supposedly covers both gas and diesel versions) explicitly says there are FOUR bolts holding transmission to engine. Four. It’s the manual. It’s the freggin manual! The whole point is that it is supposed to give you more information in order to make the job easier. After removing those 4 bolts, no matter how you angle things, the transmission just won’t come out. That would be because there are actually SIX bolts!! Now you might say “but if the manual says one thing, and you are actually there on the ground and you see extra bolts, obviously you should take them out too” right? Welllll…. Those last two bolts are in a place where there is literally no possible way to see them. Unless you have very skinny and long fingers, you probably can’t feel them either. And even if you could, there is absolutely no possibly way you are going to get a wrench or socket on them.
The secret is that, after having removed the driveshaft, you loosen the engine mounting bolts, and hold the engine up with a jack, not a block or jackstand. Then jack up the transmission just enough to remove the crossmember that holds up the transmission. Finally, lower the engine (with the tranny still attached to it) and when it’s low enough the two hidden bolts on top become exposed.
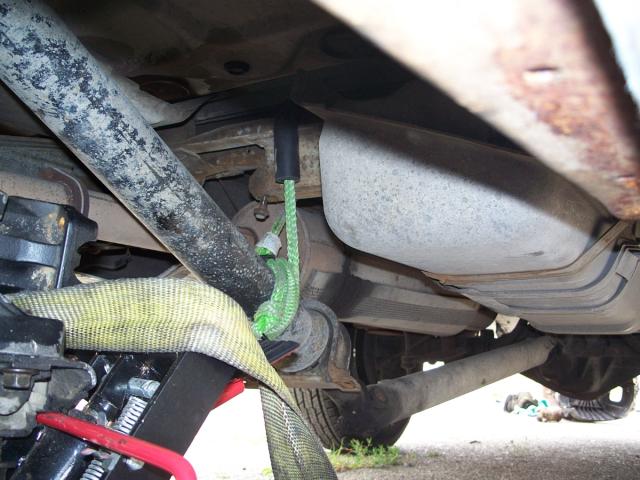
- It looks like the part of the bellhousing which is flared out to accommodate the starter gear might just barely clear the exhaust pipe.
It won’t.
Before you ever start loosening the transmission to engine bolts, detach the exhaust from the headers on both sides. Also remove the starter. They say you should detach the battery first. Officially, I’m recommending that. Unofficially, I’d point out that this would make it impossible to listen to the car stereo while you work.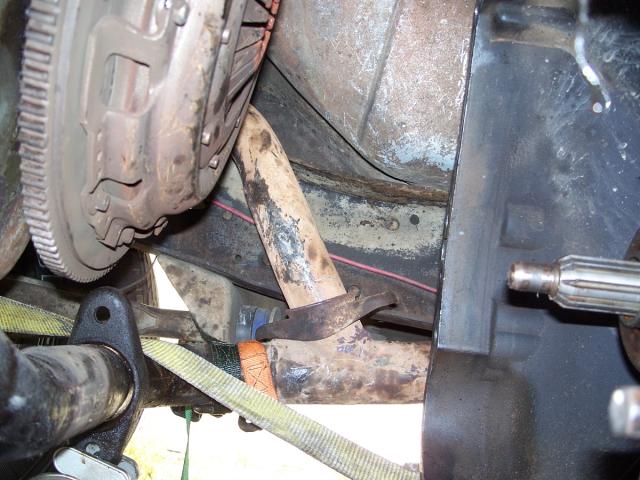
Don’t forget also to budget for transmission fluid, which should ideally be synthetic. All the manual transmissions apparently will work with a pretty wide range of fluids, from ATF to motor oil to gear oil. I’m using synthetic ATF, but I don’t know enough about the pros and cons to make any recommendations. Supposedly 30w oil will make it quieter at idle, but make it harder to shift.
What a process. I was expecting a 6-8 hour job. It should have been. Had I known everything then that I know now, it would have been. In actuality, it took almost 36 hours (maybe twice that if you count internet research and shopping time) spread over 6 days.
------------------------------------------------------------------------
The Results:
My best ever miles per gallon between fill-ups with my original transmission was 31, with several tanks getting up to 30.
On my initial test run I ran into severe traffic due to an accident. It was like a giant 6 lane parking lot. I got off at the first exit I could and took surface streets for the next couple cities. That delayed me enough that I then hit regular rush hour traffic for the rest of the way back to the fuel station. I did not feel optimistic about my mileage.
It took 3.5 gallons of biodiesel to fill up after 120 miles, so despite the traffic jam, I set a new record for the truck of 33mpg.
Of course I still wanted to know just how high it could go. Next run was at night, so there was no commute traffic to contend with. 103 miles, 2.7 gallons =
38.16mpg.
That is better mileage than the average HYBRID (
36.3 – average of all hybrid models available; not average of all hybrids actually on the road) In a 30 year old ¾-ton 5500lb V8 full-size truck. 8mpg gain, or 27%, or almost $200 a year fuel savings with current prices and my average amount of driving.
At this point its not so much about saving money anymore as just seeing how far I can take it, but its nice to know that as long as I keep the truck more than another 4 years, it will eventually pay off.
Therefore, my advice to anyone who has a vehicle old enough to not have an overdrive is: swap it out. It’s a big job, but it’s worth it.